
Respiratory emergencies are some of the most critical calls to which you will respond. If the airway is impeded or the patient is unable to exchange oxygen, you could be heading straight toward respiratory arrest. Your job is to prevent the arrest and ensure a patent airway with good air exchange—which is why a thorough understanding of thoracic anatomy is fundamental to correcting respiratory insufficiency.
Airway Anatomy
The structures that make up the airway system are typically broken down into upper and lower. These include:
Upper Airway
- Nose
- Mouth
- Pharynx
- Nasopharynx
- Oropharynx
- Hypopharynx
- Larynx
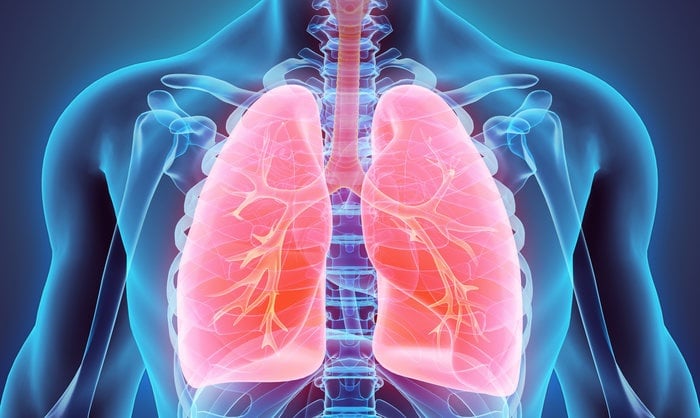
Lower Airway
- Trachea
- Lungs
- Bronchi
- Bronchioles
- Alveoli
Knowing the dimensions and locations of these structures is imperative to managing the airway. Intubation, surgical cricothyrotomy, and pleural decompression can only be performed safely if you know exactly where these structures reside within the body.
Respiration Basics
Gas exchange within the body takes place through five actions within the respiratory system:
- Ventilation: movement of air into and out of the lungs
- Distribution: delivery of air into the lungs, where gas exchange takes place
- Diffusion: tissues within the lungs engage in gas exchange
- Perfusion: blood flow through the pulmonary vasculature allows diffusion
- Circulation: the heart distributes blood throughout the body so that cellular processes can take place
At rest, the muscles that support ventilation (scalenes, pectoralis minor, serratus anterior, external intercostals, and the diaphragm) are relaxed. Upon inhalation, the diaphragm retracts downward, while the rest of the muscle assemblage expands the chest upward and out, creating negative pressure within the chest to draw air in. During exhalation, the diaphragm and musculature relax, forcing air out of the lungs, while the transversus thoracis, internal intercostals, and rectus abdominis return the ribs and sternum to their at-rest posture.

Assessing the Chest
Gauging the respiratory function of your patient is one of the most important steps in your patient assessment. You must conduct a thorough assessment of the chest to ensure your patient is moving adequate amounts of air and oxygenating their tissues. Here are a few reminders:
- Is the patient in obvious distress?
- Are they conscious and alert?
- What is the respiratory rate?
- Is breathing labored?
- Is the respiratory pattern normal or abnormal?
- Bradypnea: abnormally slow, can be normal during sleep but dangerous when oxygenation is compromised such as in drug or alcohol ingestion and in pediatrics fatigued by increased work of breathing
- Apnea: absence of respiration, lasting more than 15 seconds
- Kussmaul’s respirations: fast and deep labored breathing, often punctuated by sighs, common in diabetic ketoacidosis
- Cheyne–Stokes: a cyclical pattern of breathing, progression of increased rate and depth of respirations followed by periods of apnea
- Apneustic breathing: prolonged periods of gasping inspiration followed by brief, ineffective expiration at a rate of 1 to 2 breaths per minute
- Hyperventilation: an increased rate and depth of respirations (typically between 20 and 30 per minute), resulting from anxiety, fever, exertion, acid–base imbalance, or damage to the midbrain
- Agonal respirations: abnormal pattern that can be slow, shallow, deep, or gasping; common in those near death
- What is the respiratory depth?
- If possible, have the patient sit up and take slow, deep breaths
- Place the stethoscope against bare skin, not on top of clothing
- Do not rush your patient—that can lead to hyperventilation or exacerbate his or her dyspnea
- Auscultate over six sites both anteriorly and posteriorly—bilaterally at the second, third, and (peripherally) fifth ribs.
- Are there abnormal breath sounds?
- Wheezes: indicate a constricted airway
- Crackles: (rales) heard when collapsed airways or alveoli pop open or when mucus is in the airway
- Rhonchi: mucus in the airway
- Stridor: a “seal bark” often accompanying infection, swelling, trauma, disease, or a foreign body
- Is chest rise equal or unequal?
- Is there crepitus? (Suspected in the case of rib fractures.)
- Palpate for subcutaneous emphysema.
A thorough assessment will help you zero in on the underlying insufficiency.
Signs and Symptoms of Thoracic Trauma
Trauma to the chest can not only compromise ventilation, but it can also prevent gas exchange in the lungs. Traumatic injuries to the chest include:
- Flail chest: multiple ribs fractured in two or more places
- Hemothorax: bleeding into the chest cavity
- Cardiac tamponade: bleeding into the pericardial sac
- Tension pneumothorax: build-up of pressure within the chest, causing a shift of the mediastinum to the unaffected side
- Aortic disruption: tearing or rupture of the aorta
Maintain a high index of suspicion for thoracic trauma if any of the following are observed:
- Crepitus
- Bruising
- Swelling
- Deformity
- Impalement (stabilize in place)
- Muffled heart tones
- Abnormal breath sounds (crackles, wheezing)
- Absent breath sounds
- Asymmetrical chest rise
- Subcutaneous emphysema
A thorough understanding of thoracic anatomy will enable you to identify, treat, and correct life-threatening conditions involving the chest.
2011, Pollak, A., Ed.
Critical Care Transport, American College of Emergency Physicians, Jones and Bartlett.


